A quick and dirty approach to redacting PDFs on Debian 11 Bullseye
Warning: this is a “quick and dirty” approach. It is the completely wrong thing to use if you do not trust the PDF that you are redacting, because it opens it to convert it. From the testing I have done, it does remove the redacted text, but this is my limited testing, and I am not the NSA.
Occasionally, I want to redact text from a document, typically a PDF, before I share it with someone.
On macOS, there is the excellent PDFPen Pro. But I have not found a simple solution for Linux. So I came up with this.
Please see the warning above: it appears to work, but I am making no promises that it will work suitably for your use case. You might prefer dangerzone.
Xournal++ to block out the bits I want to redact
I use Xournal++ a lot, because it’s a great tool for marking up PDFs on the touchscreen of my Microsoft Surface computer. I can sit comfortably, and, a bit like marking up a printed document, I can scribble on it to my heart’s content.
For this scenario, I use the “Draw Rectangle” tool to block out the text I want to redact:

By default, this just adds an outline, so you need to select the “Fill” option (Tools / Pen Options / Fill):
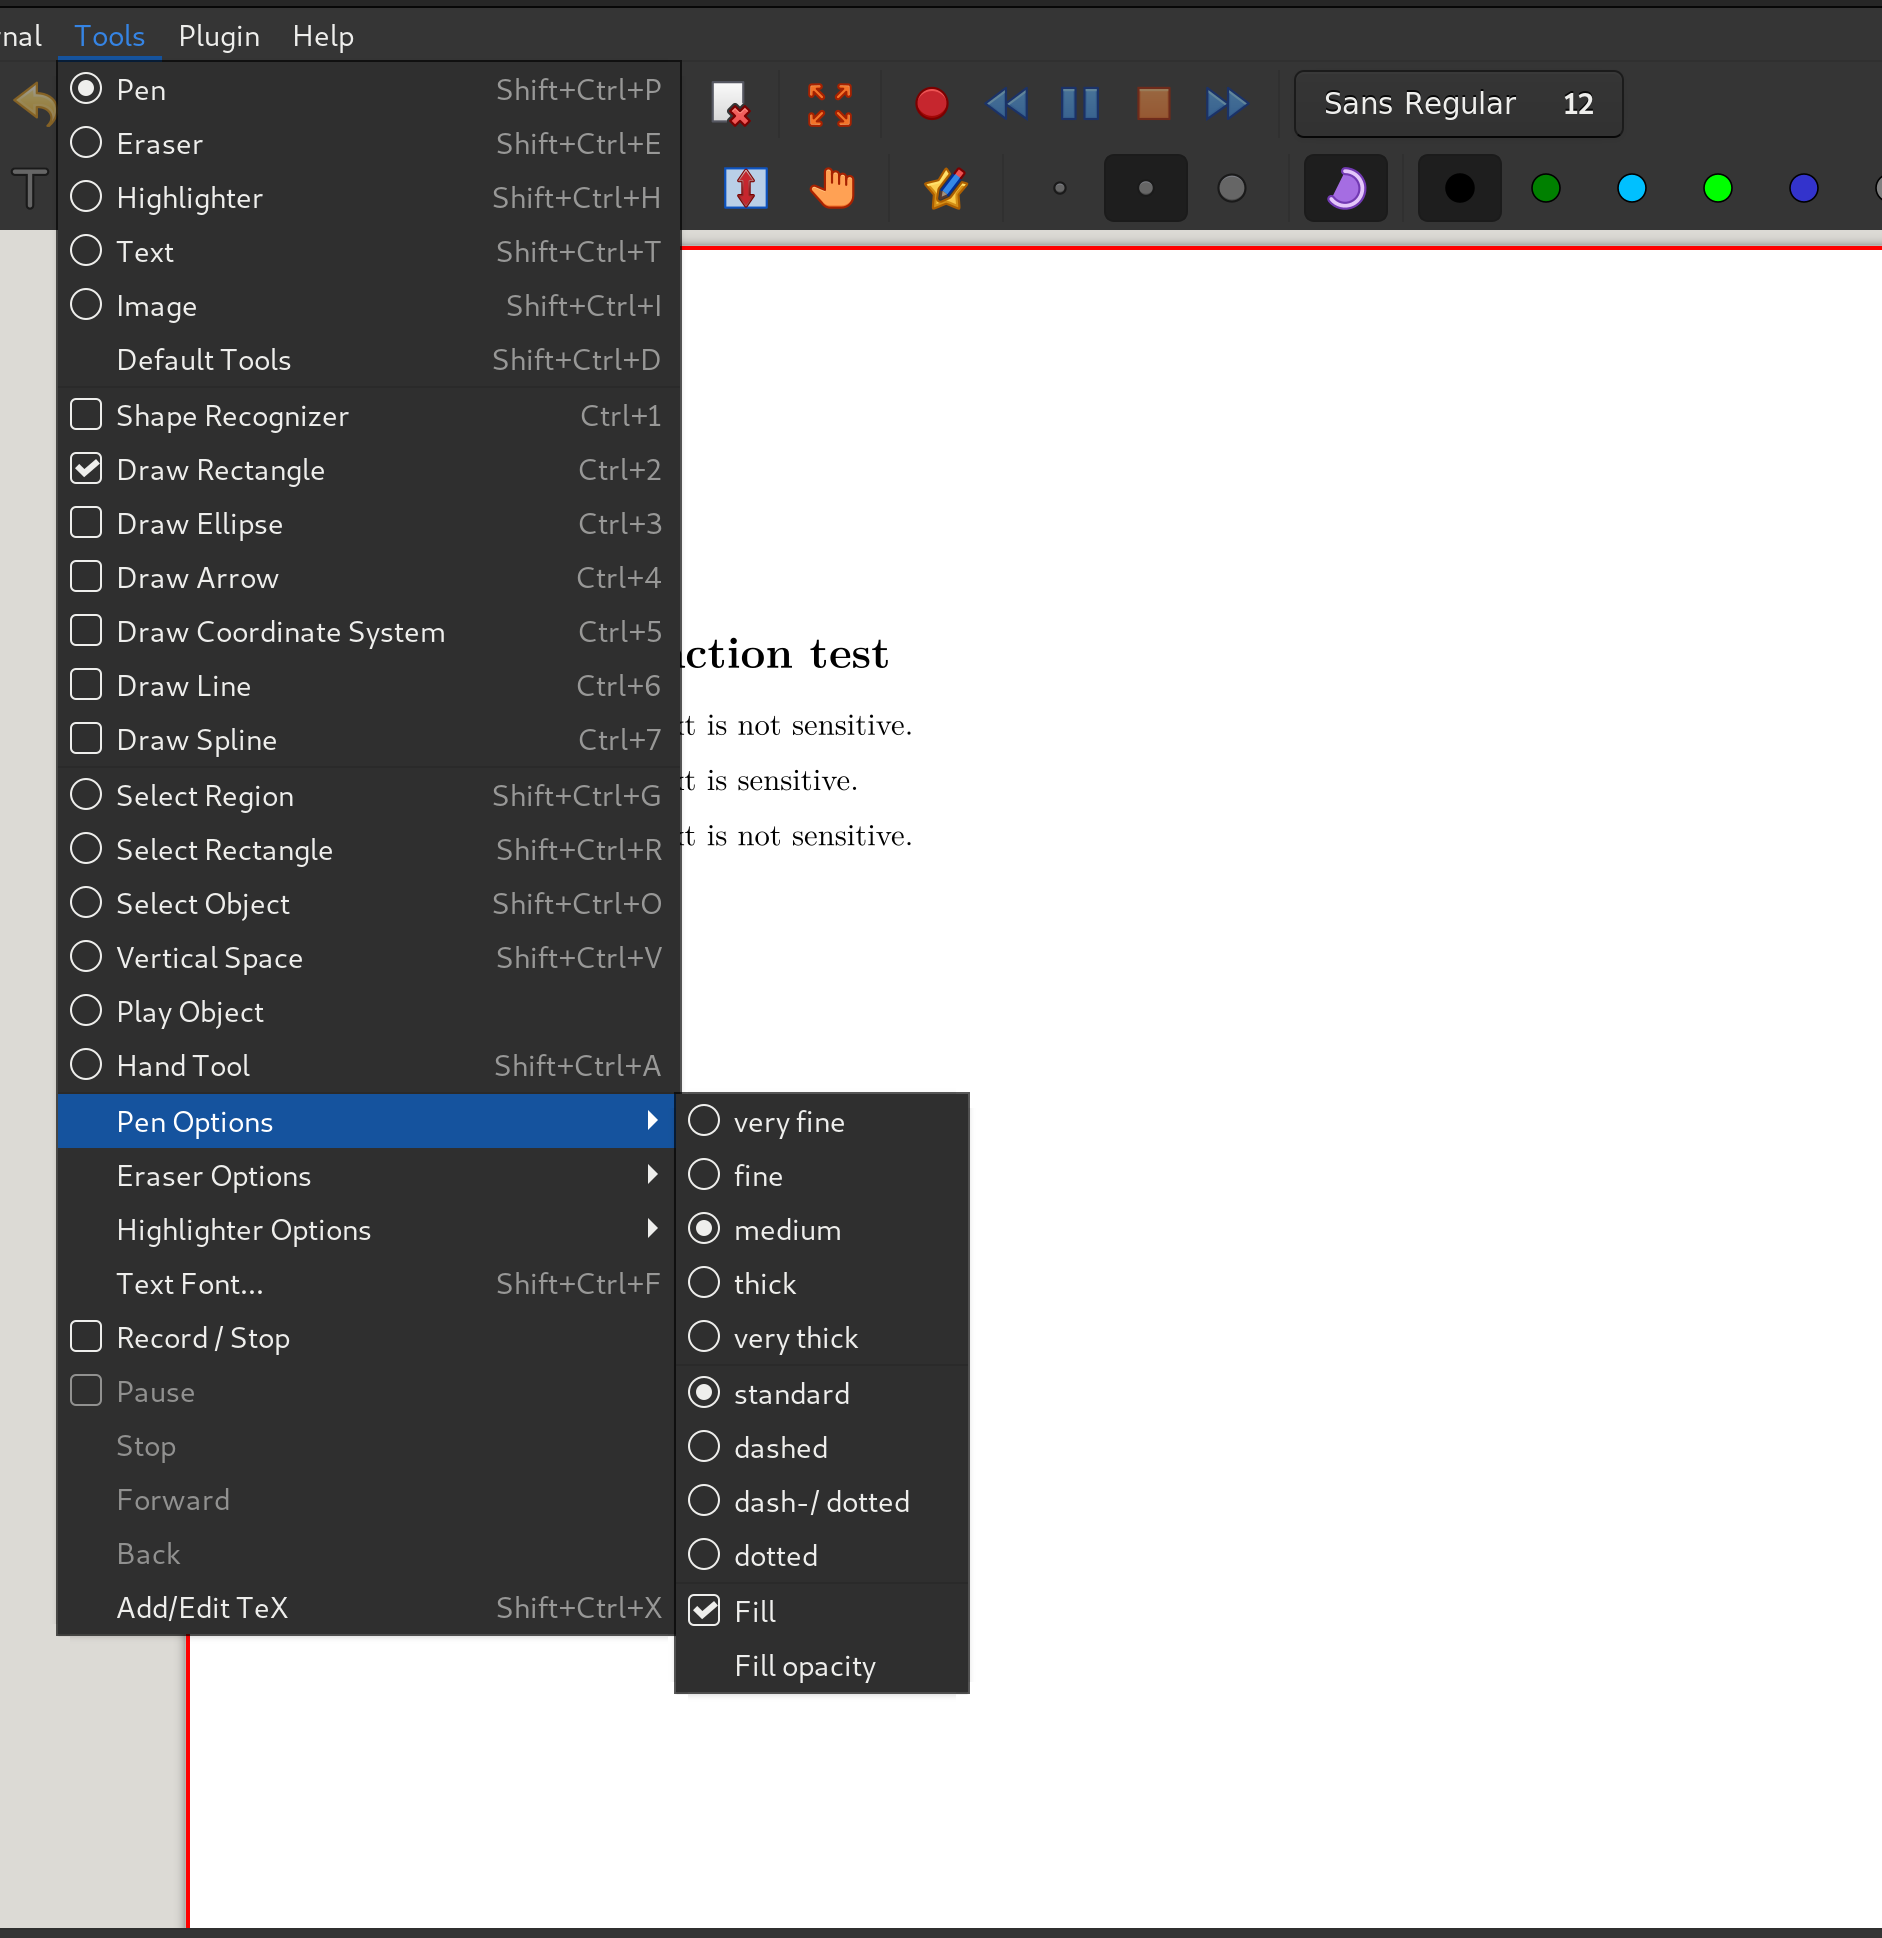
Then increase the opacity of the fill (Tools / Pen Options / Fill Opacity) to 100%:

And finally select “Black” as your colour.
When you’ve done that, you can select the bits of the document you want to block out.
No, it’s not as convenient as being able to highlight text and redact it, nor to do search-based redaction (e.g. redacting all instances of someone’s name).
When you’re done, export the PDF (File / Export as PDF).
Warning: you have not redacted the PDF
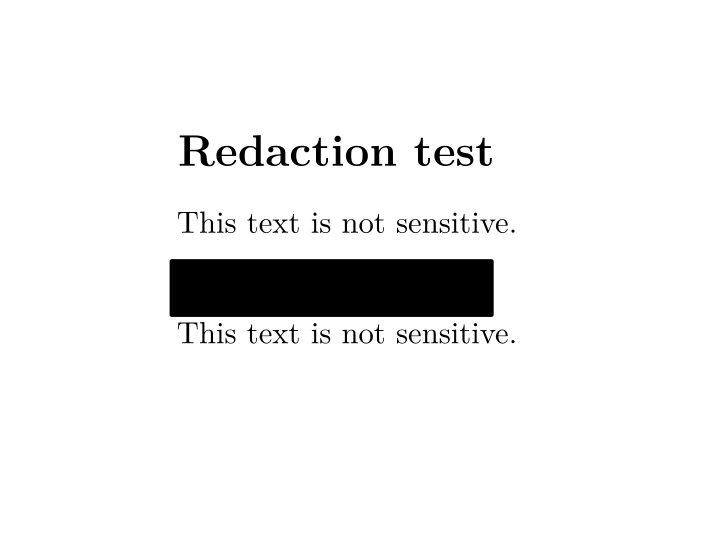
At this stage, you do not have a redacted PDF. You have a PDF with a black box over bits of the text. The underlying text is still there.
If you want to test this, just open the blocked PDF, and select all the text. The text under the blocking is still visible / selectable:
Redacting the blocked text using ghostscript, imagemagick, and ocrmypdf
I use the following quick and dirty script to redact the blocked text, and then to OCR the remaining file. (You could skip this last bit, if making the remaining text of the PDF searchable was not of benefit to you.)
#!/bin/bash

INPUTPDF="$1"
REDACTEDPDF="Redacted_$INPUTPDF"
OCRPDF="OCR_$REDACTEDPDF"


gs -o /tmp/RedactedPDFConvertedToTif.tif -sDEVICE=tiffg4 "$INPUTPDF" && convert /tmp/RedactedPDFConvertedToTif.tif "/tmp/$REDACTEDPDF"

ocrmypdf "/tmp/$REDACTEDPDF" "$OCRPDF"


rm /tmp/RedactedPDFConvertedToTif.tif
rm "/tmp/$REDACTEDPDF"
Why “quick and dirty”?
- It does not check the PDF is safe
- It does not deal with complex or unusual PDF names
- It does not check for naming collisions
- It does not use full paths for the executables
- It does not handle errors or show error messages (aside from those coming from
ghostscript,imagemagick,ocrmypdf, orrmthemselves)
But, assuming you are comfortable with those constraints, what it does is:
- uses
ghostscriptto convert the blocked PDF into the .tif image format - uses
imagemagick’sconvertfunction to turn the .tif image back into a PDF - uses
ocrmypdfto OCR the newly-created PDF
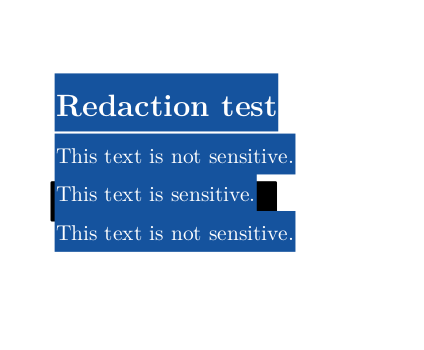
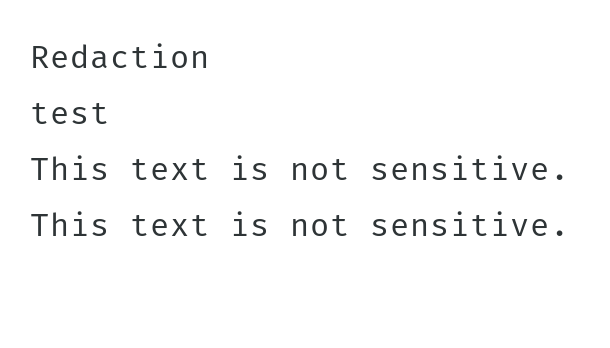
What you should find is that you get a PDF with the blocked text removed, but the rest of the PDF is searchable:
If you open the output file (beginning OCR_Redacted…), and select all the text, and paste it into a text editor, you should not be able to see the blocked out text:
Errors you might run into:
convert-im6.q16: attempt to perform an operation not allowed by the security policy `PDF' @ error/constitute.c/IsCoderAuthorized/421.
This is down to an imagemagick security policy. The solution described here feels a bit brutal, but it worked:
In /etc/ImageMagick-6/policy.xml, remove the lines:
  <policy domain="coder" rights="none" pattern="PS" />
  <policy domain="coder" rights="none" pattern="PS2" />
  <policy domain="coder" rights="none" pattern="PS3" />
  <policy domain="coder" rights="none" pattern="EPS" />
  <policy domain="coder" rights="none" pattern="PDF" />
  <policy domain="coder" rights="none" pattern="XPS" />
You may also like:
- Moving from macOS to Debian 11 Bullseye Linux: applications
- Wi-Fi on a 2012 Mac Mini, running Debian 11
- Aztine 15.6 Portable Monitor with Debian 11 on a Surface Pro 6
- Auto-unlocking a LUKS volume on an SD card on boot with Debian 11 Bullseye
- Making a Mac Mini power up when power is restored: Debian 11 version
- PinePhone (Pro) keyboard case v. Planet Gemini v GPD Pocket 2: a photo comparison
- Cloning a Raspberry Pi installation: slow, but working
- Implementing BusKill: shutting down a Debian 11 Bullseye machine when a specific USB device is removed
- Fixing 'tee: command not found' on Debian 11 Bullseye
- Installing Twitter client cawbird from the official Debian 11 Bullseye repo
- Installing Debian 11 on a Microsoft Surface Go: secure boot, mokutil, Wi-Fi, and libinih1
- WireGuard VPN plugin for NetworkManager in GNOME 3 on Debian 11 Bullseye
- Quick Image Montages
- Changing a (known) LUKS passphrase
- Brave browser: less privacy-respectful than I was expecting