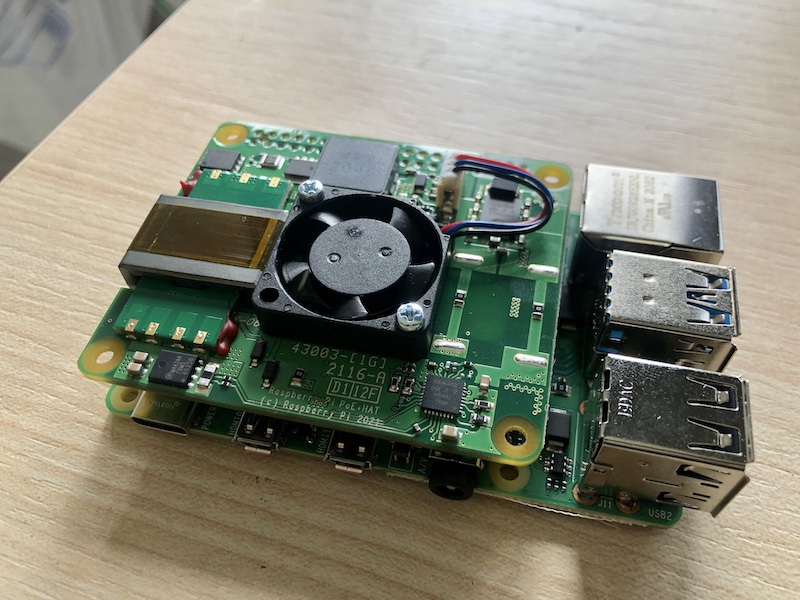
Raspberry Pi 4 with the PoE+ HAT: LUKS and a working fan
I wrote up my approach for getting vanilla Debian 11 running on a Raspberry Pi 4. It is a bit of an involved process, but I was pleased to go through it because it meant I had vanilla Debian running on my Raspberry Pis.
I got LUKS running, with ssh unlocking, for better protection of data at rest but with the convenience of not needing an IP KVM or being physically in front of the machine to boot it.
The downside? I had not realised that the latest batch of PoE HATs I had bought were the new PoE+ HATS (I didn’t realise these existed).
And I had missed the small print on The Pi Hut’s website, which says:
Note: An up to date copy of Raspberry Pi OS (and the latest kernel) is required for this HAT to function correctly. We recommend a fresh install of Raspberry Pi OS.
Now, I could be grumpy and suggest that putting this kind of information under the “View more” button, meaning it is not visible by default, is unhelpful but, ultimately, it’s my fault.
Bugger.
I wanted the fan working more than I wanted Debian 11, so I was prepared to compromise on Raspberry Pi OS (formerly Raspbian).
But I still wanted LUKS. And I also wanted a 64 bit OS, and the normal Raspberry Pi OS images are only 32 bit, seemingly for legacy reasons.
And there is a way through this, if you are willing to run an official but beta 64 bit version of Raspberry Pi OS.
It goes a bit like this:
Set up your SD card and do initial Raspberry Pi OS configuration
Download the official-but-beta Raspberry Pi 64 bit beta image. I went for the “lite” image, which does not include a desktop environment.
Flash image to SD card using Raspberry Pi Imager or Etcher.
Put the flashed SD card into your Pi. Do not plug in a USB key at this point.
Power on the Pi.
If you are using the PoE+ HAT, the fan will not power on at this point.
It will resize the root filesystem, then reboot automatically.
When you can log in, do so using the normal default credentials of username pi and password raspberry (which you will want to change; either using passwd or via the raspi-config utility).
You cannot log in using ssh at this point.
Do a full OS update:
sudo apt update && sudo apt upgrade -y
Check if there is an update available for the Raspberry Pi’s firmware:
sudo rpi-eeprom-update
If there is, apply it:
sudo rpi-eeprom-update -a
Enable ssh using the raspi-config utility:
sudo raspi-config
You want Interface options (probably third on the list), and then ssh (second on the list).
Reboot (which will also apply the ROM update, if there is one):
sudo systemctl reboot
When it has rebooted, the fan should now be running. Hallelujah.
You can also log in via ssh:
ssh pi@[PI IP ADDRESS]
Set up LUKS
I tried a number of ways of doing this, and the one I found most reliable was this set of scripts. Edit 2022-01-30: the original Github repo has gone, so this is now my forked version, with some tidied-up instructions. I don’t want to rely on something solely on Github, so I’ve uploaded them here too (.zip).)
Warning: this entails running scripts from Github. I mean, nearly all of Github use involves running code from Github, so this is hardly uncommon, but I flag it all the same. I read them through, and was content that they were doing what they were supposed to be doing, but YMMV.
Follow that guide, carefully.
Notes:
- You will need to have physical or IP KVM access to your Pi to do this, as otherwise you’ll find yourself locked out during the set-up stages.
- When you are in initramfs, you can still use tab completion.
- You will also need to have a USB stick at least as big as your SD card attached to your Pi, as it writes the SD card’s file system to and from this USB stick as part of the installation process.
- Some of these steps take their time. Just leave them. It’s still faster than trying to compile a kernel on your Pi for installation on vanilla Debian :)
When you get to the end of the script, you should have a working Raspberry Pi 4, with PoE+ HAT fan running (after you have logged in), with LUKS. Whoop!
Set up ssh decryption
I want to be able to decrypt the LUKS partition and so reboot the machine, remotely. The guide I wrote for vanilla Debian did not work on the Raspberry Pi, but this did:
Install dropbear:
sudo apt update && sudo apt install dropbear -y
Add the config:
echo 'DROPBEAR_OPTIONS="-RFEsjk -p 2222 -c /bin/cryptroot-unlock"' > /etc/dropbear-initramfs/config
Note: this will cause the ssh server to listen on port 2222. This is, IMHO, an improvement over my original guide, as it makes life easier in terms of managing known_hosts.
You will see this as part of the installation:
Don’t forget to check your “ip=” kernel bootparameter to match your desired initramfs ip configuration.
You do this by editing /etc/initramfs-tools/initramfs.conf and appending your chosen settings.
I wanted dhcp, for convenience:
echo 'IP="dhcp"' >> /etc/initramfs-tools/initramfs.conf
If you wanted a static IP, it would be something like:
echo 'IP="192.168.1.2::192.168.1.1:255.255.255.0::eth0:off"' >> /etc/initramfs-tools/initramfs.conf
using the form:
IP="<client-ip>::<gw-ip>:<netmask>::eth0:off"
Add your public key to /etc/dropbear-initramfs/authorized_keys:
Either edit the file by hand, or else:
echo 'PASTE YOUR PUBLIC KEY HERE' > /etc/dropbear-initramfs/authorized_keys
Note: I’m assuming that you already have a private/public key pair set up for ssh’ing into this box. If not, follow my previous guide for that bit.
Rebuilt your initramfs:
sudo mkinitramfs -o /boot/initramfs.gz
Reboot:
sudo systemctl reboot
When your Raspberry Pi reboots, you should be able to connect to it over ssh:
ssh -i /path/to/store/keyname -p 2222 UserKnownHostsFile=/dev/null root@server_ip
You may also like:
- Installing vanilla Debian 11 on a Raspberry Pi 4
- Fixing a font which shows in macOS Font Book but not in macOS LibreOffice
- Unlocking a LUKS-encrypted partition via ssh on Debian 10 and Debian 11
- Gemini PDA running Debian: a properly portable computer
- Running Jitsi on a Raspberry Pi 4
- Internet access via iPhone's personal hotspot on Lubuntu 21.04
- Lubuntu 21.04: forcing natural scrolling on a mouse
- Debian 10 on a Samsung NC10
- wireguard via algo: a simpler, faster(ish) alternative to IPSec